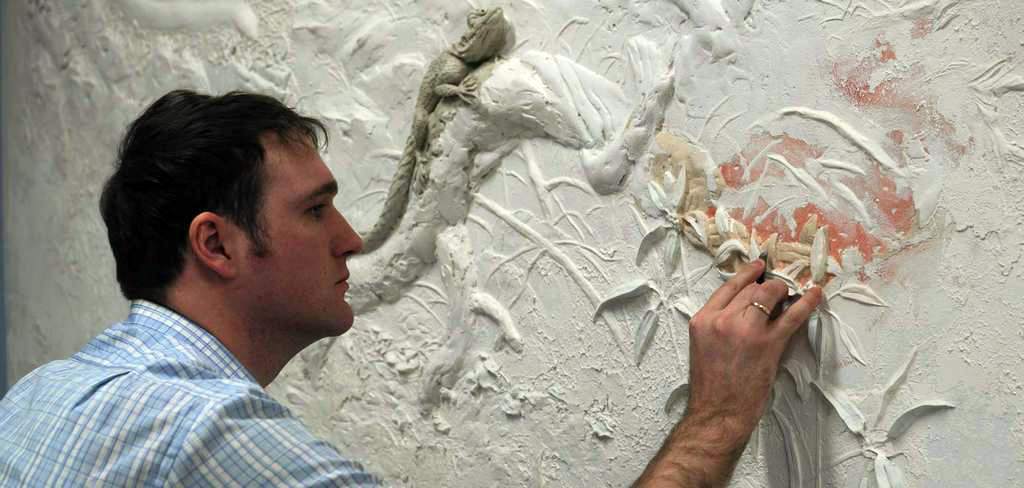
Bas-relief on a wall – one of types of ornament which can be executed by own efforts. Though it and is difficult for a beginner, but is feasible if the beginner is patient and accurate, ready to laborious work. We provide the step-by-step instruction as the stucco molding several simple receptions by the hands for beginners becomes.
What is a bas-relief in a modern interior
Desire is original to decorate housing or office execute in various ways, applying to transformation of internal space different technicians. Bas-reliefs can execute decorative and utilitarian functions in an interior. For example, them mask roughnesses or other defects, changing shortcomings in ornament, hide elements of engineering networks. It is possible to designate by means of the relief image zones in the room, to visually distort space, to create contrast or smooth transitions, a linking of zones or materials, creating complete. However the main destination of a stucco molding – decoration of the room or a facade.
The bas-relief is the some kind of semi-sculpture executed on surfaces, relief (height over the basis) which does not exceed a half of height of volume of a full-fledged sculpture (otherwise speak about high reliefs).
The bas-relief equipment allows to create images which complexity varies from simple geometrical convex figures to landscapes with many fine details demanding study. Range of the sizes of the relief image is so wide.
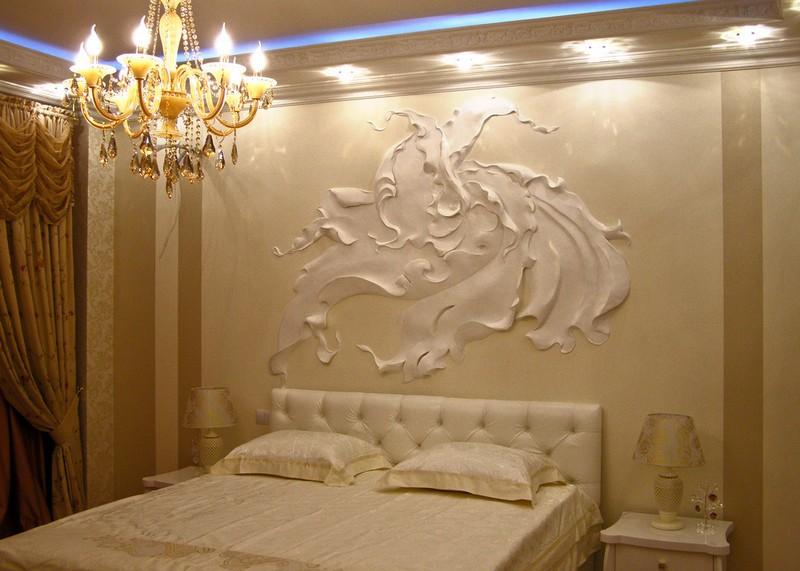
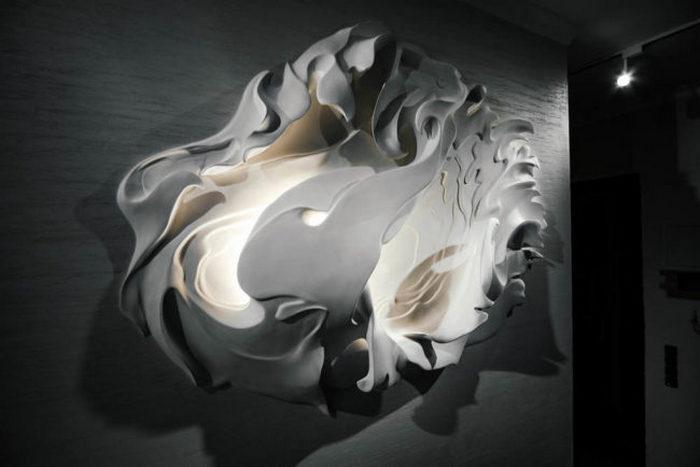
Bas-reliefs are emphasized with lighting (the direction and degree of absent-mindedness of light). Reliefs low need the directed lighting, sometimes – with a certain hade of light beams. The movement of a light stream generates variability of lines of a visible pattern. This visual effect is used, carrying out shadow bas-relief jewelry. The stucco molding with bigger height suits diffused light.
bas-relief with beautiful illumination
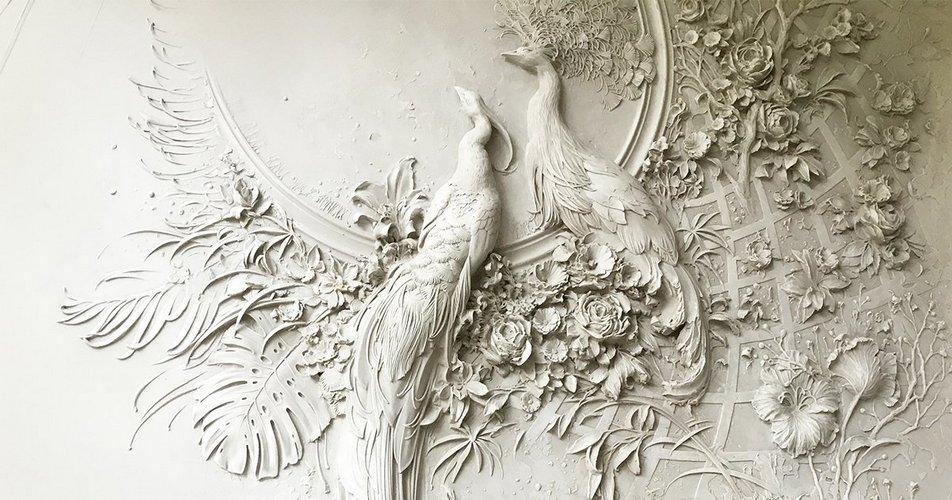
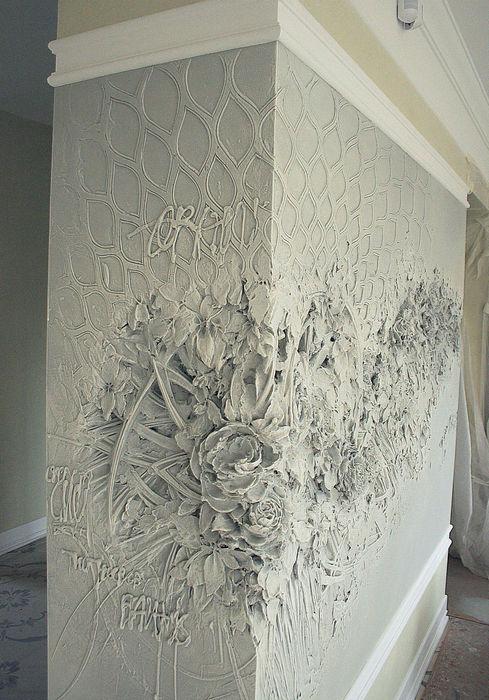
As drawings and patterns of reliefs can be various, bas-reliefs easily, organically fit into different styles of design of rooms of different function. For sleeping, an apron in kitchen, panels of a corridor, the bathroom or spacious hall it is possible to pick up ornament in a bas-relief form (a panel, a small picture, the image filling a part of a wall, for example, a tree from plaster). Convex plaster jewelry suits for walls, ceilings, columns, niches.
Except rooms, this type of finishing finishing applies to decoration of small architectural forms, arbors. Well relief finishing on retaining walls, arbors looks. Protections of loggias, facades, walls of garages – it is possible to decorate everything with a stucco molding. Only it is necessary to choose correctly materials for its performance (for the street – street or universal, for interiors – what is applied inside).
Materials for creation of a bas-relief
In plaster reliefs ancient used both clay, and alabaster (plaster), lime, mixing them with sand or stone flour. Clay was the first classical material for a molding and plaster. It is eco-friendly, waste-free, the negoryucha, is plastic, the stucco molding easily is under repair. Minuses – the big weight, a poor palette, fragility, tendency to cracking when drying.
More successful there was a plaster material thanks to peculiar to it: shrink resistance, plasticity, fast curing, environmental friendliness. The plaster powder divorced water forms nonshrinking dough of which tochnayshy figured forms are easily formed, the smoothness of a surface is reached. Besides, the stiffened plaster is well ground and cut out.
As material for relief images serves the papier-mache. Light cheap raw materials turn into the weight which is molded hands. Material does not load the basis, is eco-friendly, products easily are under repair. The shortcoming – can be formed only rough relief forms. Besides, the papier-mache is inclined to burning.
Many modern finishing mixes can be applied to creation of modelled images. Fans or masters use as raw materials for a batch of lepochny mass of filling, mixes for finishing with polymers are acrylic plasters. For example, the structure is successfully applied: plaster architectural – 1 h; acrylic plaster – 1 h; (Glue) PVA – 0.5 h (proportions take on volume). In the mixed previously dry components pour in water, bringing the stirred weight to kefiric consistence, enter glue. The viscosity is selected according to the molding equipment.
Without changes of structure use the plaster hard putties produced by the known companies:
Polish Akrilputts (acrylic filling ready and to use);
The impregnating grounding substances will be necessary for modelled work. Select impregnations according to material of the basis (wall). For the weak bases take deeply penetrating impregnating means. For the loose bases use also moisture protection, for example, Akvastop, for wood – primer Pufas.
During layer-by-layer creation of the relief image it is also required to process each layer of hard putty priming structure for receiving a rough sticky surface. Primers which composition well napityvat the laid layer are necessary and deeply penetrates it. (Before painting) will be suitable for each intermediate and final layer Pufas or Ceresit of a deep pronitsaniye.
Tools
The relief is created by means of the tools intended not only for drawing, but first of all for formation of the stacked weight. Some of tools will need to be bought, something can be made of what happens at hand.
tools for creation of a bas-relief
For example, as capacity the half of a usual rubber ball will be suitable for a batch of weight. It is easy to clean it even from the dried-up solution how to lay out all weight, having just turned inside out. Such ball will reduce time for a batch and cleaning.
The pallets called by palette knives will be necessary for a molding a special form. Their narrow shovels allow to form especially thin patterns. Still pallets with concave-convex small shovels will be necessary. Such it is possible to make of plastic or aluminum spoons (the sizes are different – tea, coffee, table or dessert). Handles for convenience unbend and curve. For example, plastic devices heat at a scoop then bend still heated handles, giving the required form. The palette knife knife can be replaced with a shoe knife with a wide edge.
For the dosed or figured drawing weight use confectionery syringes, and for delicate work – disposable medical, with a capacity of 20 ml (without needle). From candy stores it is desirable to take kurkovy.
Prepare also brushes which apply to oil painting (flat and round). There is no sense to buy expensive. Also kapron small brush for children's drawings is useful. Brushes use for plastering and imposing of the invoice. The brush for priming will be necessary.
From other tools will be necessary:
trowel metal and with a plastic shovel (solution well tries to keep step with the plastic tool);
average sizes pallet;
stacks;
chisels (for a carving on plaster);
emery paper or abrasive network;
roller.
Before a set every portion of structure, brushes and palette knives are dipped in water that the drying-up weight did not leave clots or scratches on the processed site. Upon completion of formation the tool is lowered in water and washed. Before folding on storage dry.
How to make a bas-relief on a wall with own hands
Technology of formation of a bas-relief the hands:
plastering;
casting;
molding.
Plastering – drawing a layer of plaster over model of the necessary form. Distinguish plastering of the models which are not fixed on a basis surface – free (the first type) and also the models attached to the basis (the second type). Models after hardening of the plaster test do not delete, and use in the plastered look, creating a bas-relief.
Other way of creation of details consists in the return casting with application of the model form deleted after hardening of weight (the third type). At first the model of the necessary form is made. Then by means of it make a mold in which will cast the necessary details subsequently. The way is also available the beginning finisher as it is possible to pore over the model, without making mistakes on a wall.
Actually, the molding which is carried out directly on a basis surface (the fourth type). Here initial experience is necessary. This type of the equipment allows to create big bas-reliefs with calling on the next walls or a ceiling. It is better for beginner to be trained and adapt to work on training sheets (for example, plywood or gypsum cardboard).
at once in the place, creating a complete picture;
the parts subsequently collected and mounted on a wall.
In the second option as a substrate take the fragmented sheets of gypsum cardboard. Having put a relief, pieces of gypsum cardboard attach to the leveled basis surface.
We provide the description of process of production step by step:
Clean, level, ground a basic surface (preparatory work).
Cause the background basic invoice.
Form, applying the above-stated technicians, a relief. Carry out toning if it is supposed as envisioned.
After drying carry out superficial coloring.
Carry out a latex covering.
Dry 1-2 weeks. Varnish.
By means of lamps create the necessary angle of lighting.
Such technology the details is similar to the technology stated further. Therefore we will describe nuances there.
Preparatory work
Any technology on which creation of a bas-relief is carried out includes a preparatory phase. The basis has to be equal, clean, is tenacious to hold a weighty bas-relief, to provide safe operation. Carry out such operations:
delete the served finishing (wall-paper, filled, paint, the exfoliated plaster);
clean the basis from traces of oils, rusty spots, the centers of biogrowths, an excess hardware (left isolate);
repair defective places – cracks, a splitting off, hollows, joints;
delete dust;
ground and dry up.
If it is required, perform work on alignment of a surface. Also in advance make the laid on not deleted models for plastering, plaster not attached models (on the equipment of the first type). Flower petals, leaves, berries make of the salty test or polyfoam. Ground, dry. Where plan to create thickenings, twist self-tapping screws for the best fixing.
At a preparatory stage select the image, correlating its size and arrangement to a situation indoors. That is the composition is selected prior to creation of a volume picture.
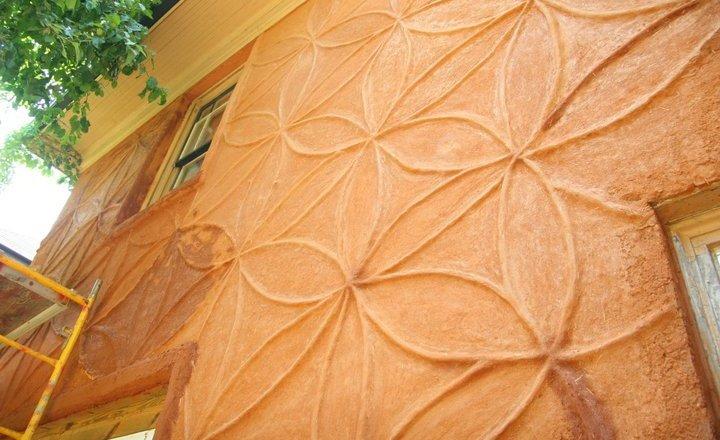
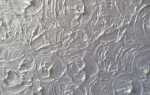
If on a plot creation of the background invoice is necessary (for example, decorative plaster travertine), then put a basic covering. Over "base" direct improvised materials (foam rubber, the roller, felt) the necessary invoice. The basis is tinted.
Creation and transfer of the sketch
The idea of the drawing is selected according to purpose of the room. So in the living room often use landscapes, children's rooms are decorated by fantastic beings, and the kitchen involves owners with a still life. Office plots differ from house. If there are skills of the artist, then with creation and also to transfer of the sketch of problems does not happen.
sketch of a bas-relief 1
sketch of a bas-relief 2
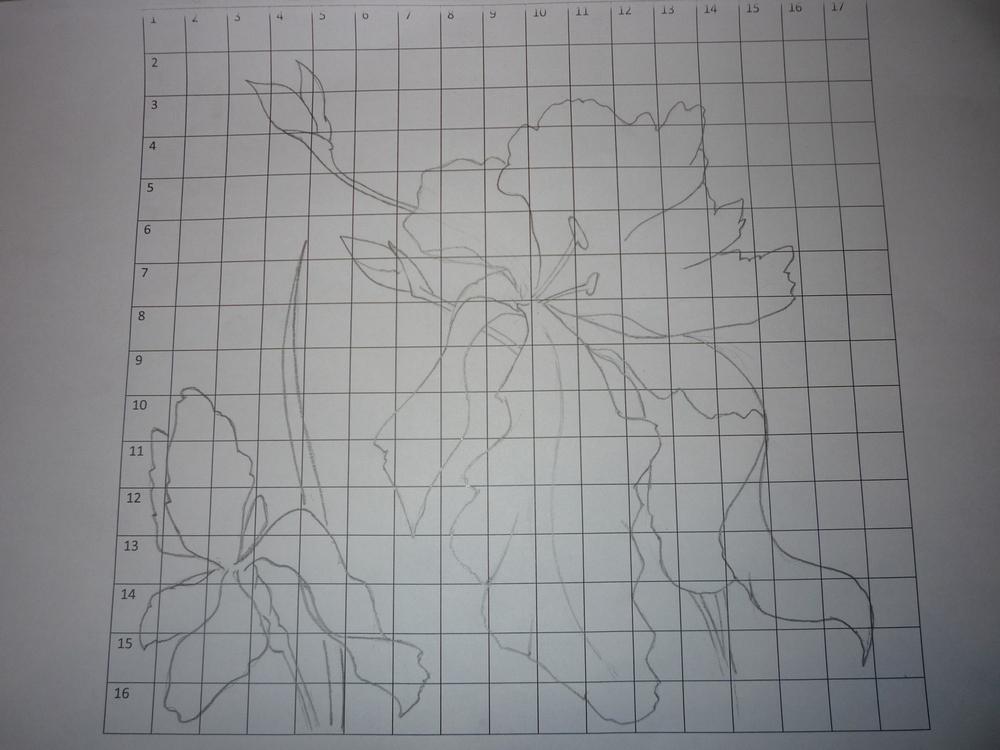
Those who for the first time start similar works can use the next ways of transfer of the drawing on a wall:
on the printed-out picture and on the place of future panel draw grids of the corresponding scales, being guided by cages which draw a pattern contour;
the chosen drawing is printed in a full size;
on lines of the printed-out picture do openings, impose the picture on a wall, by means of the cotton wool or a sponge obmaknuty in coal powder, tamponiruya openings, leave black points on a wall.
The sketch is traced most accurately. For large panels it is not obligatory to trace all sketch at once. It is enough to designate the main lines, and to trace the made-out site.
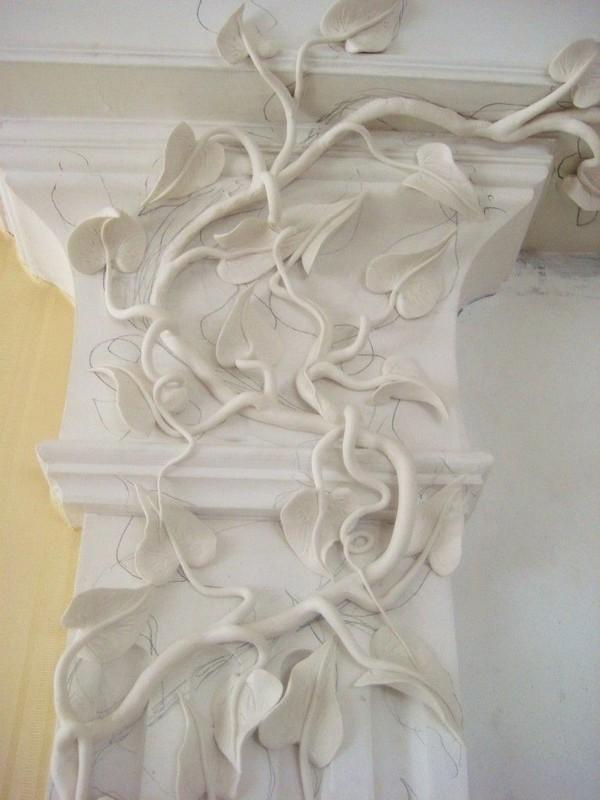
Creation of the reinforced framework
Especially convex bas-relief can demand production on a wall of a special framework. Create it from a wire. For branches a framework collect from aluminum a provolok, fastening the departing branches a soft wire from copper. Instead of a wire at low-relief panels use a cord. To receive sbeg, lengthways on cord length gradually reduce quantity of locks. The cord is dipped in the plaster talker and gives all the best through the drawing. Do it in horizontal position (on a film). After drying the branch easily is removed from a film and is pasted by plaster structure to a wall.
branches of an ornament are reinforced
For the images having height more than 20 mm, a framework do on a contour (perimeter) with a space 1-3 cm which leave for a molding. The wire frame is wound with the bandage moistened in the plaster talker of consistence of kefir. Dip a bandage roll (it is desirable not to take up small).
For reinforcing of wings or sheet plates it is possible to use the metal gauze.
We form the main relief
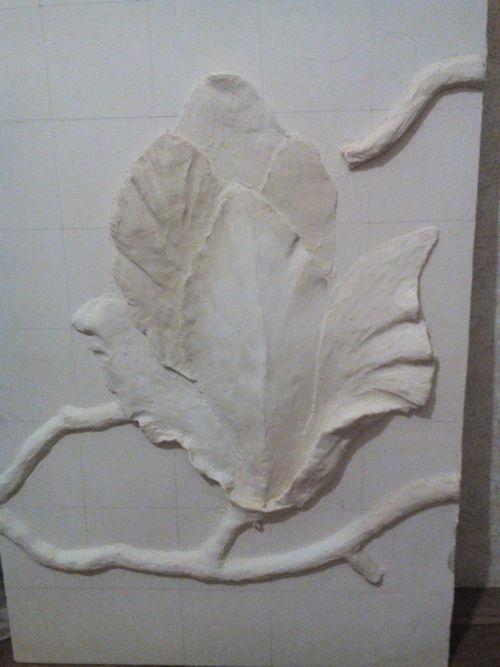
We impose hard putty on the basis by means of the convenient tool. In places of thickenings solution is applied in several passes. For the best coupling we do not level top of underlying layers. The drawing is put with sites. The main relief is carried out by the large tool: staples, trowels, sometimes master's hands.
If the area of the "high" site is big, we twist self-tapping screws on the area, placing evenly. We twist self-tapping screws so that on them to be guided pi imposing of layers (taking into account that over their hats has to remain approximately on centimeter for a molding).
At the same stage to a wall the details made separately fix. Joints cover with plaster. After drying level a nazhdachka.
formation of large details of a bas-relief 1
Formation of fine details
Where reached the necessary height of a layer, we form a surface, without postponing. Then we make out fine details, the last – the invoice of a surface. Here also brushes, palette knives, syringes will be necessary. For removal excessive (yet not stiffened) masses uses a knife.
It is not necessary to prepare a lot of solution for performance of fine details as on a portrayal and registration of "trifles" a lot of time leaves.
Not always the panel is supposed to be done with massive details. If a relief superficial, then we create details, having gained a little weight on a trowel and transferring structure to a wall. When drawing we try to smear weight to receive strong coupling. For fine, narrow details solution is applied by means of a palette knife. After drawing weight, we form its surface by tools which we can receive the thin drawing – palette knives, chisels, scalpels.
formation of fine details
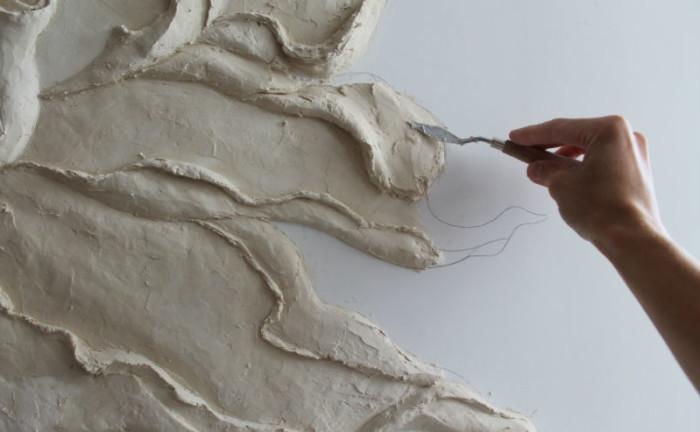
Adjustment by chisels
To emphasize a bas-relief and to make accurate on a wall of the line of a pattern, work with cutters (a chisel, a scalpel, a knife, etc.). Plaster is cut by chisels for woodcarving easily. This feature of material allows to create especially thin patterns and to modify irregular shapes.
Grinding
For smoothing, elimination of roughnesses on surfaces of a panel apply a nazhdachka, old files. For grinding of plaster structures of big effort it is not necessary to apply. Dust is swept away. After drying the surface of a panel is grounded.
Council: After use of an emery paper there are strips, they can be removed, having passed on a sculpture by liquidly divorced plaster structure.
Coloring
Bas-reliefs are valuable shadow play which is most shown at monochrome color. However on a design plan coloring or toning of the image sometimes is required. Before coloring wait for full drying of a stucco molding which is painted over on top.
coloring of a surface of a bas-relief
Apply special paints to a plaster stucco molding. Applying paint, at once make a rastushyovyvaniye a damp sponge, receiving thin half tone. If sharp color transitions are necessary, use the acrylic painting structures.
On the dried plaster of paint fade. Processing by latex helps to restore a color. Apply butodiyen-styrene latex structure to restoration of color. Surplus of latex, is absorbed and disappear. In 1-2 weeks it is possible to varnish a surface.
Organization of illumination
"To recover" a relief panel, competent illumination is necessary. Think of placement of lamps in advance, it is necessary to execute prior to the beginning of a plastering the hidden conducting for fastening of a light source on a wall, to buy lamps of suitable power and design. The used lamps should not be excessively bright.
beautiful illumination of a relief on a wall
Light is usually directed down (from top to down – the most natural direction which is not doing the image bulky, but creating effect of its separation from a wall). Sometimes light a panel sideways. The lighting directed from below-up creates illusion of massiveness, some grandeur.
Use LED linear or dot lamps and also LED tapes to illumination. The design of lamps is selected according to a plot or style of a decor of the room.
Advantages and shortcomings of a bas-relief on a wall
Bas-reliefs are appreciated for:
showiness – shadow play creates special feeling of space which changes when switching lamps;
an opportunity to show originality;
it is inventive to issue the surfaces which are usually "in desolation" – arches, niches, fireplaces;
an opportunity to hide roughnesses of walls;
to create connection of zones with smooth transition between them.
There are also minuses:
complexity of performance for the beginner;
it is difficult to repair (in case of damage);
at the order will cost much to experts;
quickly dust on a figured surface collects.
Bas-relief on an idea photo wall
What can make a bas-relief on a wall and the selection of photos prepared by us will help to stock up with the ideas. It is also possible to get acquainted with a master class of performance of a bas-relief, having watched videos.
Modern materials allow to reduce time of creation of large-size elements and to lose ornament weight. So handymen make the fixed models of polyurethane foam, cover them with plaster and paint. We suggest beginners to get acquainted with the equipment, having watched video.
Restoration and care of a bas-relief
At breaking off of parts it is easy to restore them, using the structure similar to initial. For increase in coupling the surface is cleaned, grounded. Then dissolve dry mix or plaster and apply weight on the damaged place. Formation is carried out, trying to execute transition by imperceptible. Paint is renewed. The varnished panel is cleaned with water or damp fabric.
As found out, a bas-relief on a wall, having laid hands, even the beginner can quite create. The main thing during the work – patience, readiness to carefully study even fine details and creative mood.
 bas-relief from clay
  KNAUF unifleet
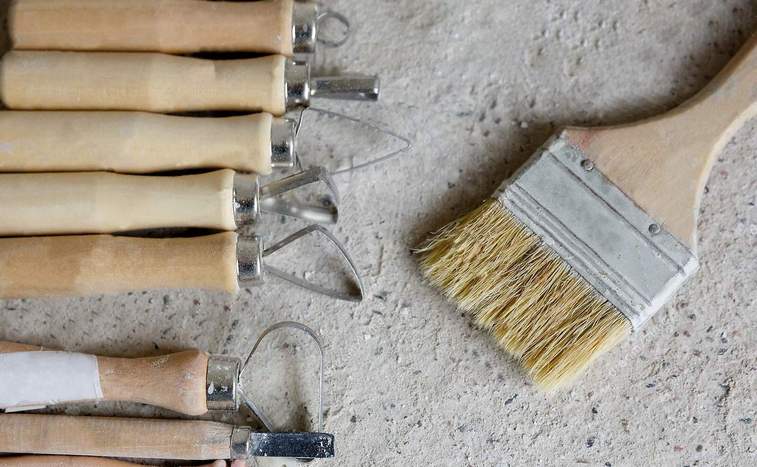
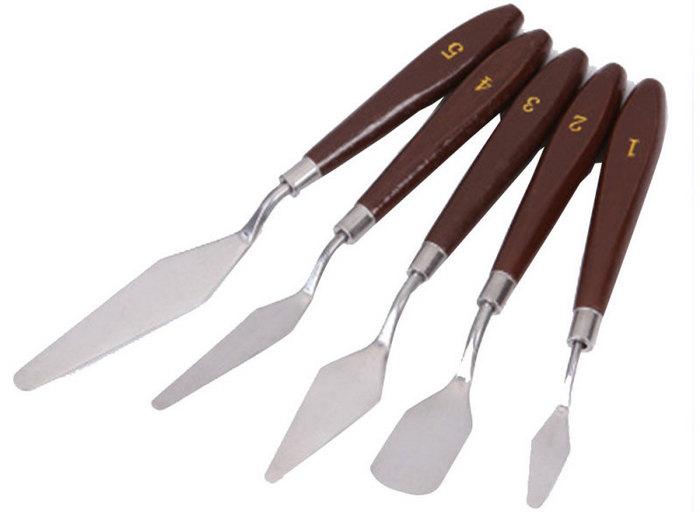 palette knives
 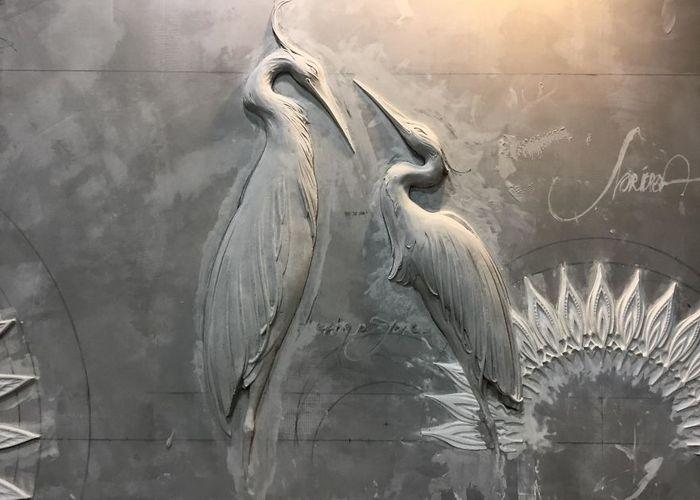 creation of a bas-relief


 Features of creation of a bas-relief from different materials
 (yet there are no estimates)
 How to make decorative plaster under a brick for internal finishing of walls in an interior?
 How to make decorative plaster with own hands for internal finishing of walls from usual hard putty
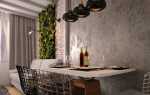 Decorative plaster an art concrete in style the loft: types, drawing, coloring
 Technology of creation of inexpensive decorative plaster from the paper and newspapers